Showing 1–12 of 108 resultsSorted by latest


Die Casting Machine
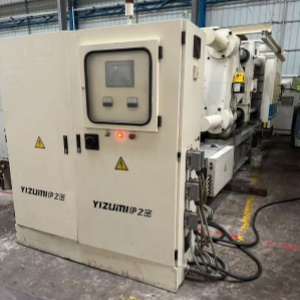
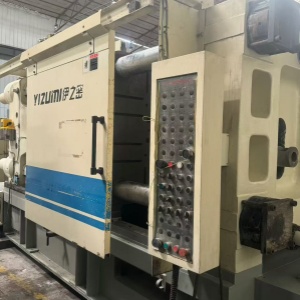
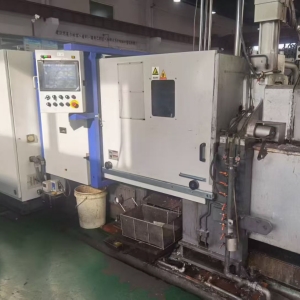
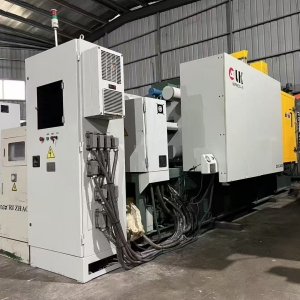
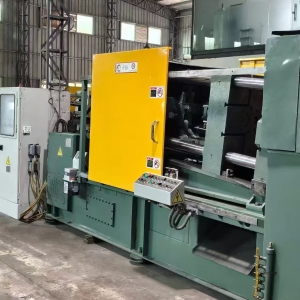
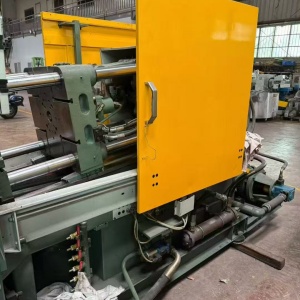

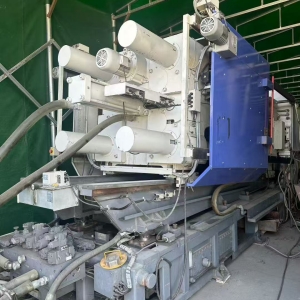
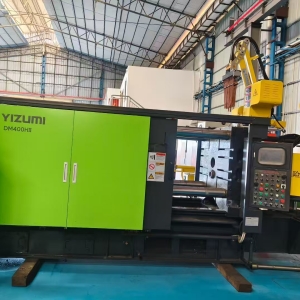
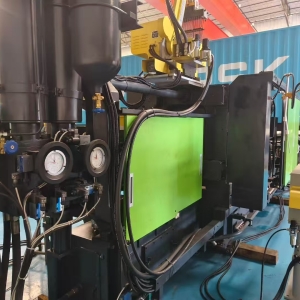

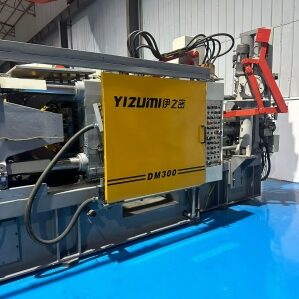


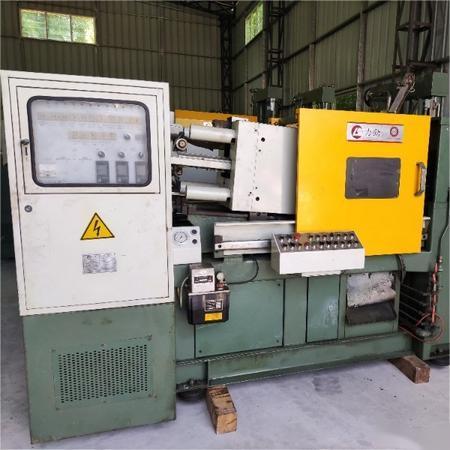
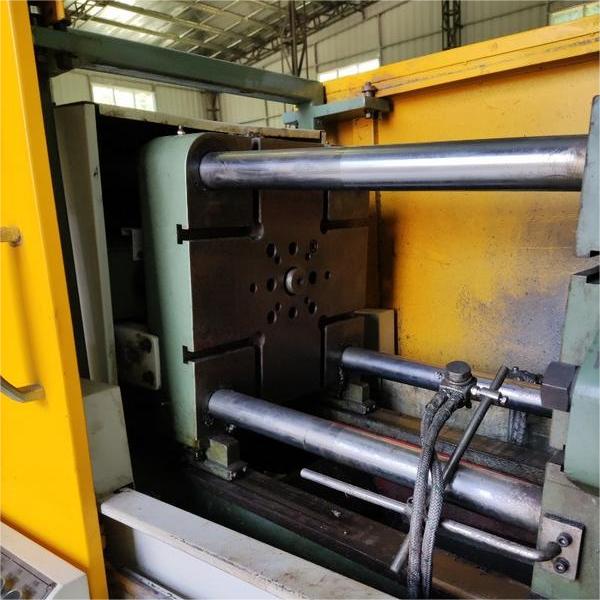

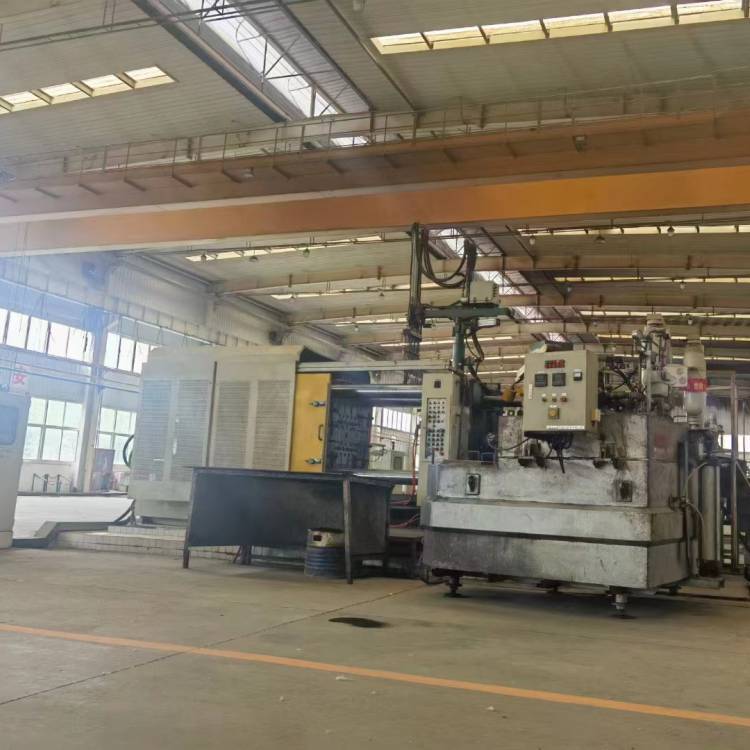
USED DIE CASTING MACHINE FOR SALE
Explore top-quality used die casting machines for sale at competitive prices. Our inventory includes a variety of high-performance machines suitable for all types of die casting processes, including aluminum, zinc, and magnesium casting. With options from leading manufacturers, our selection caters to businesses looking to enhance their production capabilities without the hefty investment in new equipment. Whether you're expanding your operations or replacing older machinery, find the perfect used die casting machine to meet your production requirements and budget constraints. Visit our marketplace today to browse the latest listings and take the first step towards optimizing your manufacturing process.
FAQ
This FAQ offers a deep dive into die casting machines, covering their operation, types, maintenance, and troubleshooting tips. Perfect for manufacturers, engineers, and hobbyists, it provides expert insights and practical advice to optimize performance, enhance productivity, and ensure the longevity of your die casting equipment.
What is the die casting machine?
A bandsaw is a versatile power tool used for sawing various materials, most commonly wood, metal, and plastic. It consists of a continuous band of toothed metal stretched between two or more wheels to cut material. This band saw blade travels in a continuous loop, allowing for uniform cutting action and the ability to make both straight and irregular or curved cuts with precision.
Bandsaws are available in various sizes, from small benchtop models to large floor-standing industrial machines. The size of a bandsaw is typically determined by the diameter of the wheels and the throat, which is the distance from the blade to the vertical frame section of the saw. This determines the maximum width of material that can be cut.
One of the key advantages of a bandsaw over other types of saws is its ability to make intricate cuts without needing to start from the edge of the material. This makes it particularly useful for woodworking, metalworking, and in the construction of complex parts or artistic pieces. Additionally, because the blade of a bandsaw moves in a downward motion, there is less tendency for the material being sawed to move or shift during cutting, resulting in more accurate and cleaner cuts.
How to use a die casting machine?
Using a bandsaw effectively and safely requires understanding its basic operation, setting it up properly, and following safety guidelines. Here’s a step-by-step guide on how to use a bandsaw:
1. Safety First
- Wear appropriate personal protective equipment (PPE), including safety glasses, hearing protection, and dust masks.
- Ensure long hair is tied back, and avoid loose clothing or jewelry that could get caught in the machine.
2. Inspect and Prepare the Bandsaw
- Check the bandsaw for any signs of wear or damage. Ensure the blade is sharp, properly tensioned, and appropriate for the material and type of cut you plan to make.
- Adjust the blade guide and guard according to the thickness of the material being cut, ensuring it’s just above the material’s surface to minimize blade exposure.
3. Set Up Your Workpiece
- Securely clamp or firmly hold your material in place. If the piece is small or irregularly shaped, consider using a jig or push stick to keep your hands safely away from the blade.
4. Make the Cut
- Power on the bandsaw and let it reach full speed before beginning your cut.
- Feed the material into the blade gently, guiding it along the marked line if you’re making a precise cut. Maintain a steady feed rate that allows the blade to cut without forcing or binding.
- Keep your fingers and hands at a safe distance from the blade at all times. Use push sticks or push blocks for close work.
5. Manage Curves and Corners
- For curves, make relief cuts to remove excess material and reduce the stress on the blade. Turn the workpiece gently, keeping the feed rate consistent without twisting or bending the blade.
- For tight corners, you may need to stop the saw, back the material out carefully, and then start the cut again from a different angle.
6. Finishing Up
- Once the cut is complete, allow the blade to stop completely before removing the workpiece or making adjustments.
- Turn off the bandsaw, disconnect it from power, and clean up any debris or sawdust.
Additional Tips
- Regularly check and adjust the blade tension and tracking to ensure optimal performance.
- Use the right blade for the material and type of cut. For example, use a finer tooth blade for metal and plastic, and a coarser blade for wood.
- Practice on scrap material if you’re new to using a bandsaw to get a feel for the feed rate and blade behavior.
By following these steps and tips, you can safely and effectively use a bandsaw for a wide range of cutting tasks.
How to choose die casting machine?
Choosing the right bandsaw involves considering several factors to ensure it meets your specific needs. Here’s a guide to help you make an informed decision:
1. Determine the Purpose
Woodworking: Look for bandsaws with finer blades for intricate cuts and the ability to handle various wood types and thicknesses.
Metalworking: Opt for a bandsaw designed for metal, which typically has slower speeds and may come with a coolant system.
General Use: If you need a bandsaw for a variety of materials, consider a variable-speed model that can be adjusted based on the material you’re cutting.
2. Size and Throat Capacity
Throat Capacity: This is the distance from the blade to the vertical frame section of the saw, determining the maximum width of the workpiece that can be cut. Choose a capacity that fits the largest pieces you plan to cut.
Depth of Cut: The maximum height a bandsaw can cut. Ensure the saw can accommodate the thickness of the materials you’ll be working with.
3. Motor Power
Light-duty Tasks: A less powerful motor (around 0.5 to 1 HP) may be sufficient for simple, small-scale projects or softer materials.
Heavy-duty Tasks: For cutting thick materials or continuous use, consider a bandsaw with a more powerful motor (1.5 HP or higher).
4. Blade Features
Blade Width: Determines the minimum radius of cuts. Narrower blades are better for intricate, curved cuts, while wider blades are ideal for straight cuts and resawing.
Blade Teeth Per Inch (TPI): Higher TPI blades make smoother cuts and are better for cutting thin materials, whereas lower TPI blades are faster and better for thick materials.
5. Additional Features
Table Size and Tilt: A larger table offers more support for bigger workpieces. Tilt capability allows for angled cuts.
Guide System: Ensures the blade tracks properly. Look for adjustable guides for ease of use and precision.
Dust Collection: Essential for keeping the work area clean and maintaining visibility.
Safety Features: Such as blade guards, emergency stop buttons, and lockout switches.
6. Budget and Brand
Price Range: Determine your budget beforehand, but remember that higher-quality saws may be more expensive.
Brand Reputation: Consider brands known for durability, reliability, and customer service. Reading reviews and seeking recommendations can be helpful.
7. Warranty and Support
Look for products with a solid warranty and accessible customer support for maintenance and repair inquiries.
Conclusion
The right bandsaw for you depends on the types of projects you undertake, the materials you work with, and the features that are most important to you. Assessing your needs and researching can lead to a purchase that enhances your ability to create and build with precision and efficiency.
How bandsaw die casting machine?
A bandsaw works by using a continuous looped blade that is driven by two or more wheels to cut through material. Here’s a breakdown of its working mechanism:
Blade and Wheels: The bandsaw blade, a thin strip of metal with teeth on one edge, is looped around two or more wheels. These wheels are typically aligned vertically within the bandsaw frame, with one wheel above the work table and the other below it. At least one of these wheels is motor-driven to rotate, propelling the blade in a continuous loop.
Power Source: The bandsaw’s motor powers the rotation of the wheels and, consequently, the movement of the blade. The motor’s size and power output can vary depending on the bandsaw model, with larger bandsaws requiring more powerful motors to cut through thicker or harder materials.
Cutting Action: The blade moves in a downward direction on the front side of the bandsaw, where the material to be cut is positioned on the bandsaw’s table. This directional movement ensures that the material is firmly held against the table during cutting, reducing the likelihood of inaccuracies or the material moving.
Adjustable Table and Guide: The bandsaw table, where the material is placed for cutting, can typically be adjusted to various angles for making precise cuts at different angles. Blade guides above and below the table help keep the blade aligned and stable during cutting, ensuring precise and straight cuts. These guides can be adjusted depending on the thickness of the material being cut.
Variable Speed: Some bandsaws come with variable speed controls, allowing the user to adjust the speed of the blade depending on the type of material being cut. Slower speeds are often used for cutting metal or plastic to prevent overheating, while higher speeds can be used for wood.
Making the Cut: To make a cut, the user marks the material with the desired cut line, turns on the bandsaw, and then feeds the material into the blade, guiding it along the cut line. The bandsaw allows for both straight and curved cuts, making it exceptionally versatile for different types of projects.
Dust Collection: Many bandsaws are equipped with dust collection ports that allow for the attachment of a dust collector or shop vacuum. This helps in managing sawdust and keeping the work area clean.
By moving the material through the blade, rather than moving the blade through the material (as is common with handheld saws), bandsaws provide a stable and controlled cutting environment that is ideal for precise, intricate, and repetitive cutting tasks.
What are the die casting machine brands?
There are numerous bandsaw brands known for their quality, durability, and range of offerings, catering to both professional woodworkers and hobbyists alike. Here’s a list of some of the most recognized bandsaw brands:
Grizzly Industrial: Known for offering a wide range of durable and high-quality woodworking and metalworking machinery, including bandsaws for various applications.
Jet Tools: Offers a variety of power tools and machinery, including bandsaws with features that cater to both professional and amateur woodworkers.
Laguna Tools: Well-regarded for their high-performance woodworking and metalworking tools, Laguna bandsaws are often praised for their innovation and precision.
Delta Machinery: A historic brand known for its reliable woodworking tools, including bandsaws that cater to both professional shops and hobbyists.
DeWalt: While better known for portable power tools, DeWalt also offers portable bandsaws that are popular among professionals for their durability and performance.
WEN: Offers a range of affordable yet reliable power tools, including bandsaws that are great for hobbyists and those on a budget.
Rikon: Specializes in woodworking machinery, including bandsaws that are well-liked for their quality and innovative features.
Powermatic: Known for its high-quality, heavy-duty woodworking machinery, Powermatic bandsaws are aimed at professionals requiring precision and reliability.
Milwaukee: Renowned for their electric power tools, Milwaukee’s portable bandsaws are highly regarded in the construction and metalworking industries for their power and durability.
SawStop: While best known for their table saws with safety features, SawStop also offers bandsaws that incorporate high-quality construction and safety.
Makita: Offers portable bandsaws that are popular in the construction industry, known for their compact design and efficiency.
When choosing a bandsaw, it’s essential to consider the specific needs of your projects, including the size of material you’ll be cutting, the types of cuts you’ll be making (straight vs. intricate curves), and your budget. Different brands offer unique features, such as variable speed controls, different sizes (from benchtop to floor-standing models), and various safety features. Reading reviews, comparing specifications, and considering after-sales support can also help in making an informed decision.
How much is a die casting machine?
The price of a bandsaw can vary widely based on several factors, including the brand, size, power, features, and whether it’s designed for hobbyist or industrial use. Here’s a general price range to give you an idea:
Entry-Level or Benchtop Bandsaws: These are smaller, more compact bandsaws suitable for hobbyists or light-duty work. Prices can range from around $200 to $500. They are great for small projects and can handle a variety of materials with moderate precision.
Mid-Range Bandsaws: These models offer more power, larger cutting capacities, and additional features like better blade guides and more substantial tables. Prices for mid-range bandsaws can range from $500 to $1,500. They cater to serious hobbyists and semi-professional woodworkers.
Professional or Industrial Bandsaws: Designed for heavy-duty use, these bandsaws have large capacities, powerful motors, and durable construction. They often include advanced features like variable speeds, larger tables, and sophisticated dust collection systems. Prices for professional bandsaws can start from around $1,500 and go up to $5,000 or more, depending on the specifications and features.
Specialized Bandsaws: Some bandsaws are designed for specific tasks, such as metalworking, meat cutting, or resawing. These can vary in price depending on their specialization and range from $500 to several thousand dollars.
The actual cost will depend on your specific needs, such as the type of materials you plan to cut, the size of material, the precision required, and how frequently you’ll use the machine. It’s also worth noting that prices can vary based on where you purchase the bandsaw, any ongoing sales or discounts, and additional costs like shipping or extended warranties. Always consider checking multiple retailers and reviews to find the best deal for your requirements.
How to replace die casting machine?
Replacing a bandsaw blade involves several steps to ensure safety and accuracy in the setup for your next cutting task. Here’s a step-by-step guide on how to do it:
Safety First
Disconnect the Power: Ensure the bandsaw is unplugged or disconnected from its power source to prevent accidental startup.
Wear Protective Gear: Use safety glasses and gloves to protect your eyes and hands from sharp edges.
Removing the Old Blade
Open the Bandsaw: Open the wheel covers to access the blade.
Relieve Blade Tension: Locate the tension adjustment knob or lever, usually at the top of the bandsaw, and reduce the tension by turning it until the blade is loose. Some models may have a quick-release tension mechanism.
Remove Blade Guides: Loosen and move the blade guides and thrust bearings away from the blade. These are located above and below the table near the blade. This step is crucial for removing the blade without obstruction.
Detach the Blade: Carefully remove the blade from the wheels. You might need to twist the blade slightly to navigate it out of the bandsaw’s throat plate area.
Installing the New Blade
Choose the Right Blade: Select a blade with the appropriate width, tooth pattern, and material for your cutting needs.
Thread the Blade: Carefully thread the new blade around the wheels and through the guides and thrust bearings. Ensure the teeth are pointing in the right direction (downwards and towards the front of the bandsaw).
Adjust Blade Tension: Once the blade is in place, adjust the tension knob or lever to tighten the blade. Follow the manufacturer’s recommendations for the correct tension. Too little tension can cause the blade to wander or come off the wheels; too much tension can lead to premature blade or equipment failure.
Align the Blade: Adjust the blade so that it sits centered on the wheels. Use the tracking adjustment knob, usually located at the back of the upper wheel, to fine-tune the blade’s position while turning the wheel by hand.
Set Blade Guides and Thrust Bearings: Re-adjust the blade guides and thrust bearings so they are close to, but not touching, the blade. This is crucial for accurate cuts and to prevent the blade from deflecting.
Check Everything: Before closing the wheel covers, make a final check to ensure everything is correctly set up. The blade should be properly tensioned, centered, and the guides should be correctly adjusted.
Final Steps
Test the Bandsaw: After reassembling, plug in the bandsaw and turn it on briefly to ensure the blade runs smoothly and stays on the wheels. Listen for any unusual noises or vibrations that might indicate improper installation.
Make a Test Cut: After confirming the blade runs correctly, make a test cut on a piece of scrap material to ensure the setup is correct and the cut quality meets your expectations.
Always refer to your bandsaw’s manual for specific instructions related to your model. Manufacturers might have unique features or steps that are important for the safe and effective operation of your specific bandsaw.
What size bandsaw do I need?
Choosing the right size bandsaw depends on several factors, including the type of projects you plan to undertake, the materials you’ll be cutting, and the space available in your workshop. Here are some guidelines to help you decide:
Throat Capacity
The throat capacity or throat depth of a bandsaw is the distance from the blade to the vertical frame section of the saw body. It determines the maximum width of material that you can cut.
For light-duty tasks, hobbyist projects, or if you’re working with smaller pieces of material, a bandsaw with a throat capacity of 12 to 14 inches might suffice.
For larger projects or if you plan to cut wider materials, look for a bandsaw with a throat capacity of 18 inches or more.
Resaw Capacity
Resaw capacity is the maximum height of material the bandsaw can cut. It’s important if you plan to slice thicker pieces of wood into thinner boards.
A larger resaw capacity is beneficial for tasks such as resawing lumber into thinner slabs or bookmatching. Bandsaws with a resaw capacity of 12 inches or more are ideal for these types of tasks.
Motor Power
Motor power is crucial, especially if you’re cutting through dense materials or require continuous use.
Light to medium projects typically require a motor power of 0.5 to 1.5 horsepower (HP).
For more demanding tasks, such as cutting through metal or hardwoods, or for industrial use, consider a bandsaw with a motor that has 2 HP or more.
Table Size and Features
The size of the bandsaw table is also an important consideration, as it supports the material during cutting. A larger table provides better support for bigger workpieces.
Some tables offer tilt capabilities, which are useful for making angled cuts. Consider a bandsaw with a table that tilts up to 45 degrees if you anticipate needing angled cuts.
Floor Standing vs. Benchtop
Floor standing bandsaws are larger, offer greater capacity and power, and are suited for professional or heavy-duty use. They’re the go-to choice for serious woodworkers or industrial applications.
Benchtop bandsaws are more compact and can be placed on a workbench. They’re suitable for hobbyists or those with limited space.
Consider Your Projects
For general woodworking tasks, a bandsaw with a 14-inch throat capacity and a 6 to 12-inch resaw capacity is a good start.
For cutting metal, look for a bandsaw specifically designed for metalworking, which often includes features like variable speed controls and a more robust construction.
For intricate scroll work or smaller pieces, a smaller benchtop model might be sufficient.
Space and Budget
Consider the amount of space you have available. Larger, floor-standing models require more room but offer greater capabilities.
Budget is also a key factor. Bandsaws can range from a few hundred to several thousand dollars. Balancing your needs with how much you’re willing to invest is crucial.
Ultimately, the “right” size bandsaw is one that fits your specific needs, the space you have available, and your budget. It’s worth considering future projects as well; a slightly larger and more capable bandsaw can provide more versatility and room to grow as your skills and projects evolve.
How to adjust bandsaw?
Adjusting a bandsaw correctly is crucial for optimal performance, accurate cuts, and safety. Here’s a comprehensive guide on how to adjust various components of your bandsaw:
1. Blade Tension
Correct tension is essential for precise cuts. Most bandsaws have a tension gauge, but they’re not always accurate. A general rule is to tighten the blade until it’s firm and doesn’t deflect more than about 1/4 inch when you push on it with moderate pressure.
For saws without a gauge, refer to the manual for specific recommendations on tension settings based on blade width.
2. Blade Tracking
Blade tracking refers to the alignment of the blade on the wheels. With the bandsaw unplugged, open the top wheel cover, and turn the wheel by hand. Adjust the tracking knob until the blade runs centered on the wheel’s crown. The blade should not drift toward the front or back of the wheel.
3. Blade Guides
Blade guides support the blade near the cut point. Adjust the side guides and the thrust bearing behind the blade so they are close to, but not touching, the blade. They should support the blade during a cut without hindering its movement.
4. Table Alignment
Square the table to the blade using a square. Loosen the table tilt adjustment, and adjust until the blade is perpendicular to the table. Tighten the adjustment to secure the table in place.
5. Fence Alignment
If your bandsaw has a fence, ensure it’s parallel to the blade’s path. This can usually be adjusted by loosening the fence mount and aligning the fence with the miter slot or another fixed point on the table.
6. Guide Post Height
Adjust the guide post height so the guides are just above the material being cut. This minimizes blade exposure and vibration for safer and more accurate cuts.
7. Checking for Square Cuts
After making these adjustments, test the saw by cutting a piece of wood. Check the cut for squareness and adjust the table tilt or guide settings if necessary.
Safety and Maintenance Tips
Always unplug the bandsaw before making adjustments.
Regularly check blade sharpness and replace dull blades to ensure clean cuts and reduce strain on the bandsaw.
Keep the bandsaw clean, including the wheels, guides, and table. Accumulated sawdust can affect performance and accuracy.
Lubricate moving parts as recommended by your bandsaw’s manual to keep them operating smoothly.
Adjusting a bandsaw is a continuous process. Wood species, humidity, and wear can affect its performance, so it’s a good practice to check these settings regularly and especially before starting a new project or after changing the blade. Always refer to your bandsaw’s manual for specific instructions and safety information.
How to build a bandsaw?
Building a bandsaw from scratch is an ambitious project that appeals to experienced woodworkers and metalworkers with a good understanding of machinery and a well-equipped workshop. It involves fabricating or sourcing various components, including the frame, wheels, blade, motor, and guides, and then assembling them into a functioning tool. Here’s a simplified overview of the steps involved in building a basic bandsaw:
Design and Planning
Determine the Size: Decide on the size of the bandsaw based on the maximum width (throat capacity) and height (resaw capacity) of the material you plan to cut. This will influence the size of the wheels and the frame.
Draw Detailed Plans: Create or obtain detailed plans that include dimensions for all components. Plans can be found in woodworking books, magazines, or online resources.
Frame Construction
Material Selection: The frame can be made from metal (for durability and stability) or wood (easier to work with for DIY projects). Steel is a common choice for metal frames.
Fabrication: Cut and weld (for metal) or cut and join (for wood) the frame components according to your design. The frame must be sturdy and accurately aligned to ensure smooth operation.
Wheels and Blade
Wheels: You can fabricate wheels from wood or metal, or repurpose wheels from another machine. Wheels must be perfectly round and balanced for the bandsaw to operate smoothly.
Tires: Bandsaw wheels are typically fitted with rubber or urethane tires to provide grip and reduce blade wear. These can be purchased or made to fit your wheels.
Blade: Purchase a bandsaw blade that fits the size of your bandsaw and is suitable for the type of cutting you plan to do.
Motor and Drive System
Motor Selection: Choose a motor with sufficient power for your needs. A common choice is a 1 to 2 HP motor for a medium-sized bandsaw.
Drive System: Design a system to transfer power from the motor to the lower wheel. This usually involves pulleys and a belt.
Guides and Table
Blade Guides: Fabricate or purchase blade guides to keep the blade aligned during cutting. Guides are critical for accurate cuts and can be made from metal or high-wear-resistant plastics.
Table: Build a table with a slot for the blade. The table should be flat and sturdy, and it can be made adjustable for angle cuts.
Assembly and Adjustment
Assemble Components: Assemble the frame, wheels, motor, and table. Install the blade and adjust the tension and tracking.
Adjust Blade Guides: Set the blade guides and thrust bearings close to the blade without touching it.
Test and Fine-Tune: Power up the bandsaw, make test cuts, and adjust as necessary to ensure smooth operation and accurate cuts.
Safety and Finishing Touches
Safety Features: Install necessary safety features, including blade guards, a power switch, and possibly a dust collection port.
Finishing: Apply finish or paint to protect the bandsaw, especially if it’s made of wood or susceptible to corrosion.
Building a bandsaw requires a significant investment of time, resources, and a deep understanding of machinery. It’s a rewarding project for those looking for a challenge and a customized tool. If you’re new to such projects, consider starting with simpler machinery builds or working under the guidance of an experienced mentor.
